
Troubleshooting
-
Make sure you have recently calibrated Solo.
Go to Settings > Note Detection Sensitivity.
Watch the video to guide you through the calibration process.
Get in touch if you’re still having issues.
-
Check that your audio interface is compatible with iOS and that you’re using the correct cables.
Plug your guitar into input one on your audio interface - Solo will only listen to input one, so be sure to not use any other inputs.
Set your input gain levels correctly on your audio interface input so that you are achieving a good signal level without clipping - refer to your audio interface manual for this step.
Go to Settings > Note Detection Sensitivity > Start Calibration.
Watch the help video on the calibration screen for help with this step.
-
The interval trainer requires you to select at least one intervallic function in order to start a workout.
Tap Choose Intervallic Functions.
Make your selection.
Slide the Intervallic Function selection panel back down.
The “Start Intervallic Function Workout” button will now be blue, ready to go.
The changes trainer requires you to select a set of chord changes and a level in order to start a workout.
Tap on Select Chord Changes.
Make your selection from the list.
Tap on Select a Level.
Make you selection from the list.
The Start Changes Workout button will now be blue, ready to go.
The scale trainer requires you to select a scale in order to start a workout.
Tap on Select a Scale.
Make your selection from the list.
The Start Scale Workout button will now be blue, ready to go.
-
Once you’ve started a workout, tap and hold anywhere on the screen to exit.
-
Check the Advance to Next Note setting in the workout setup screen. If you have On Tap selected, you need to tap on the screen (not on the fretboard if it’s displayed) to progress to the next note.
-
Check that you have the correct instrument (and tuning) selected.
Go to Settings > Instrument
Make you selection from the pop-up list.
-
The fretboard is only available in the Notes and Intervals trainers. You can access the fretboard in those trainers by turning on Show Fretboard in the workout setup screens, or by swiping from right to left whilst in a workout.
If the option to show the fretboard is not appearing, or it cannot be swiped onto the focus screen, make sure you have the correct instrument selected in the Solo’s settings. The fretboard cannot be used if Bb/Eb Horn, Concert Pitch or Concert Pitch-1 settings are used.
Tap the Settings icon in the top right of the app.
Select the appropriate guitar or bass setting from the Instrument list pop-up.
-
The workout options in the Changes Trainer are tied to certain levels. For example, if you select a level with a single chord tone, the Random and Reverse options won’t be available under Interval Order as they wouldn’t make sense for that level. If you can’t see a workout option available for a particular level, it’s either not applicable to that level or wouldn’t make sense.
-
We decided that, since the Changes Trainer is designed to take a workout through an entire chord progression or exercise, the concept of duration didn’t make sense here. The duration of your workout is instead determined by how long it takes you to get through the chosen chord progression and level you’ve selected.
-
In the Changes Trainer, the Single Chord Exercises & Basic Chord Progressions are designed with the Randomise Key On Repeat feature in mind. When you select Ex.1 to Ex.24 be sure to turn on Repeat and Randomize Key On Repeat.
-
Due to the way many jazz standards and modern chord progressions modulate frequently to new keys for short periods of time, it’s very complex to program an app that can understand the subtleties of enharmonic spellings throughout these temporary modulations.
When using the transpose function, Solo will always show you the ‘correct’ chord and intervallic functions, but occasionally you will see an incorrect enharmonic spelling of a root note. We are actively working on finding a solution for this issue.
Running Solo on a Mac
Solo is designed for a touch based interface on iPhone and iPad, but can also be installed and runs natively on all Apple Silicon Macs (M1, M2 and M3 etc.). Macs without an in-built microphone, such as the Mac mini and Mac Studio, require an external audio interface or USB microphone to run Solo. You can also use your iPhone as a microphone for your Mac, via Apple’s continuity feature.
You can interact with Solo using a trackpad or mouse exactly the same way you would with a touch screen, except for: -
Exiting a workout - Long click with the mouse/trackpad anywhere on the Solo window.
Exiting Help, Settings plus the Choose Intervallic Functions and Scales selection screens - click anywhere behind the popup window.
Solo isn’t detecting notes whilst using an audio interface with a Mac.
If Solo is currently running, close it.
Plug your guitar into input one on your audio interface - Solo will only listen to input one, so be sure to not use any other inputs.
Set your input gain levels correctly on your audio interface so that you are achieving a good signal level without clipping - refer to your audio interface manual for this step.
Go to System Settings > Sound > Output & Input > Input.
Select the audio interface that your guitar is plugged into.
Launch Solo, it will now listen to the first input of the chosen device.
Be sure to calibrate the note detection sensitivity again in the app settings.
If you’re still having issues check your Mic Mode settings. Start a workout and check that your Mic Mode (orange, mic shaped icon in the menu bar at the top of your screen) is set to Standard and not Voice Isolation - unfortunately, due to the way Apple currently implement the Mic Mode feature in MacOS, you can only change this setting while Solo is either running a workout or calibrating Note Detection Sensitivity.
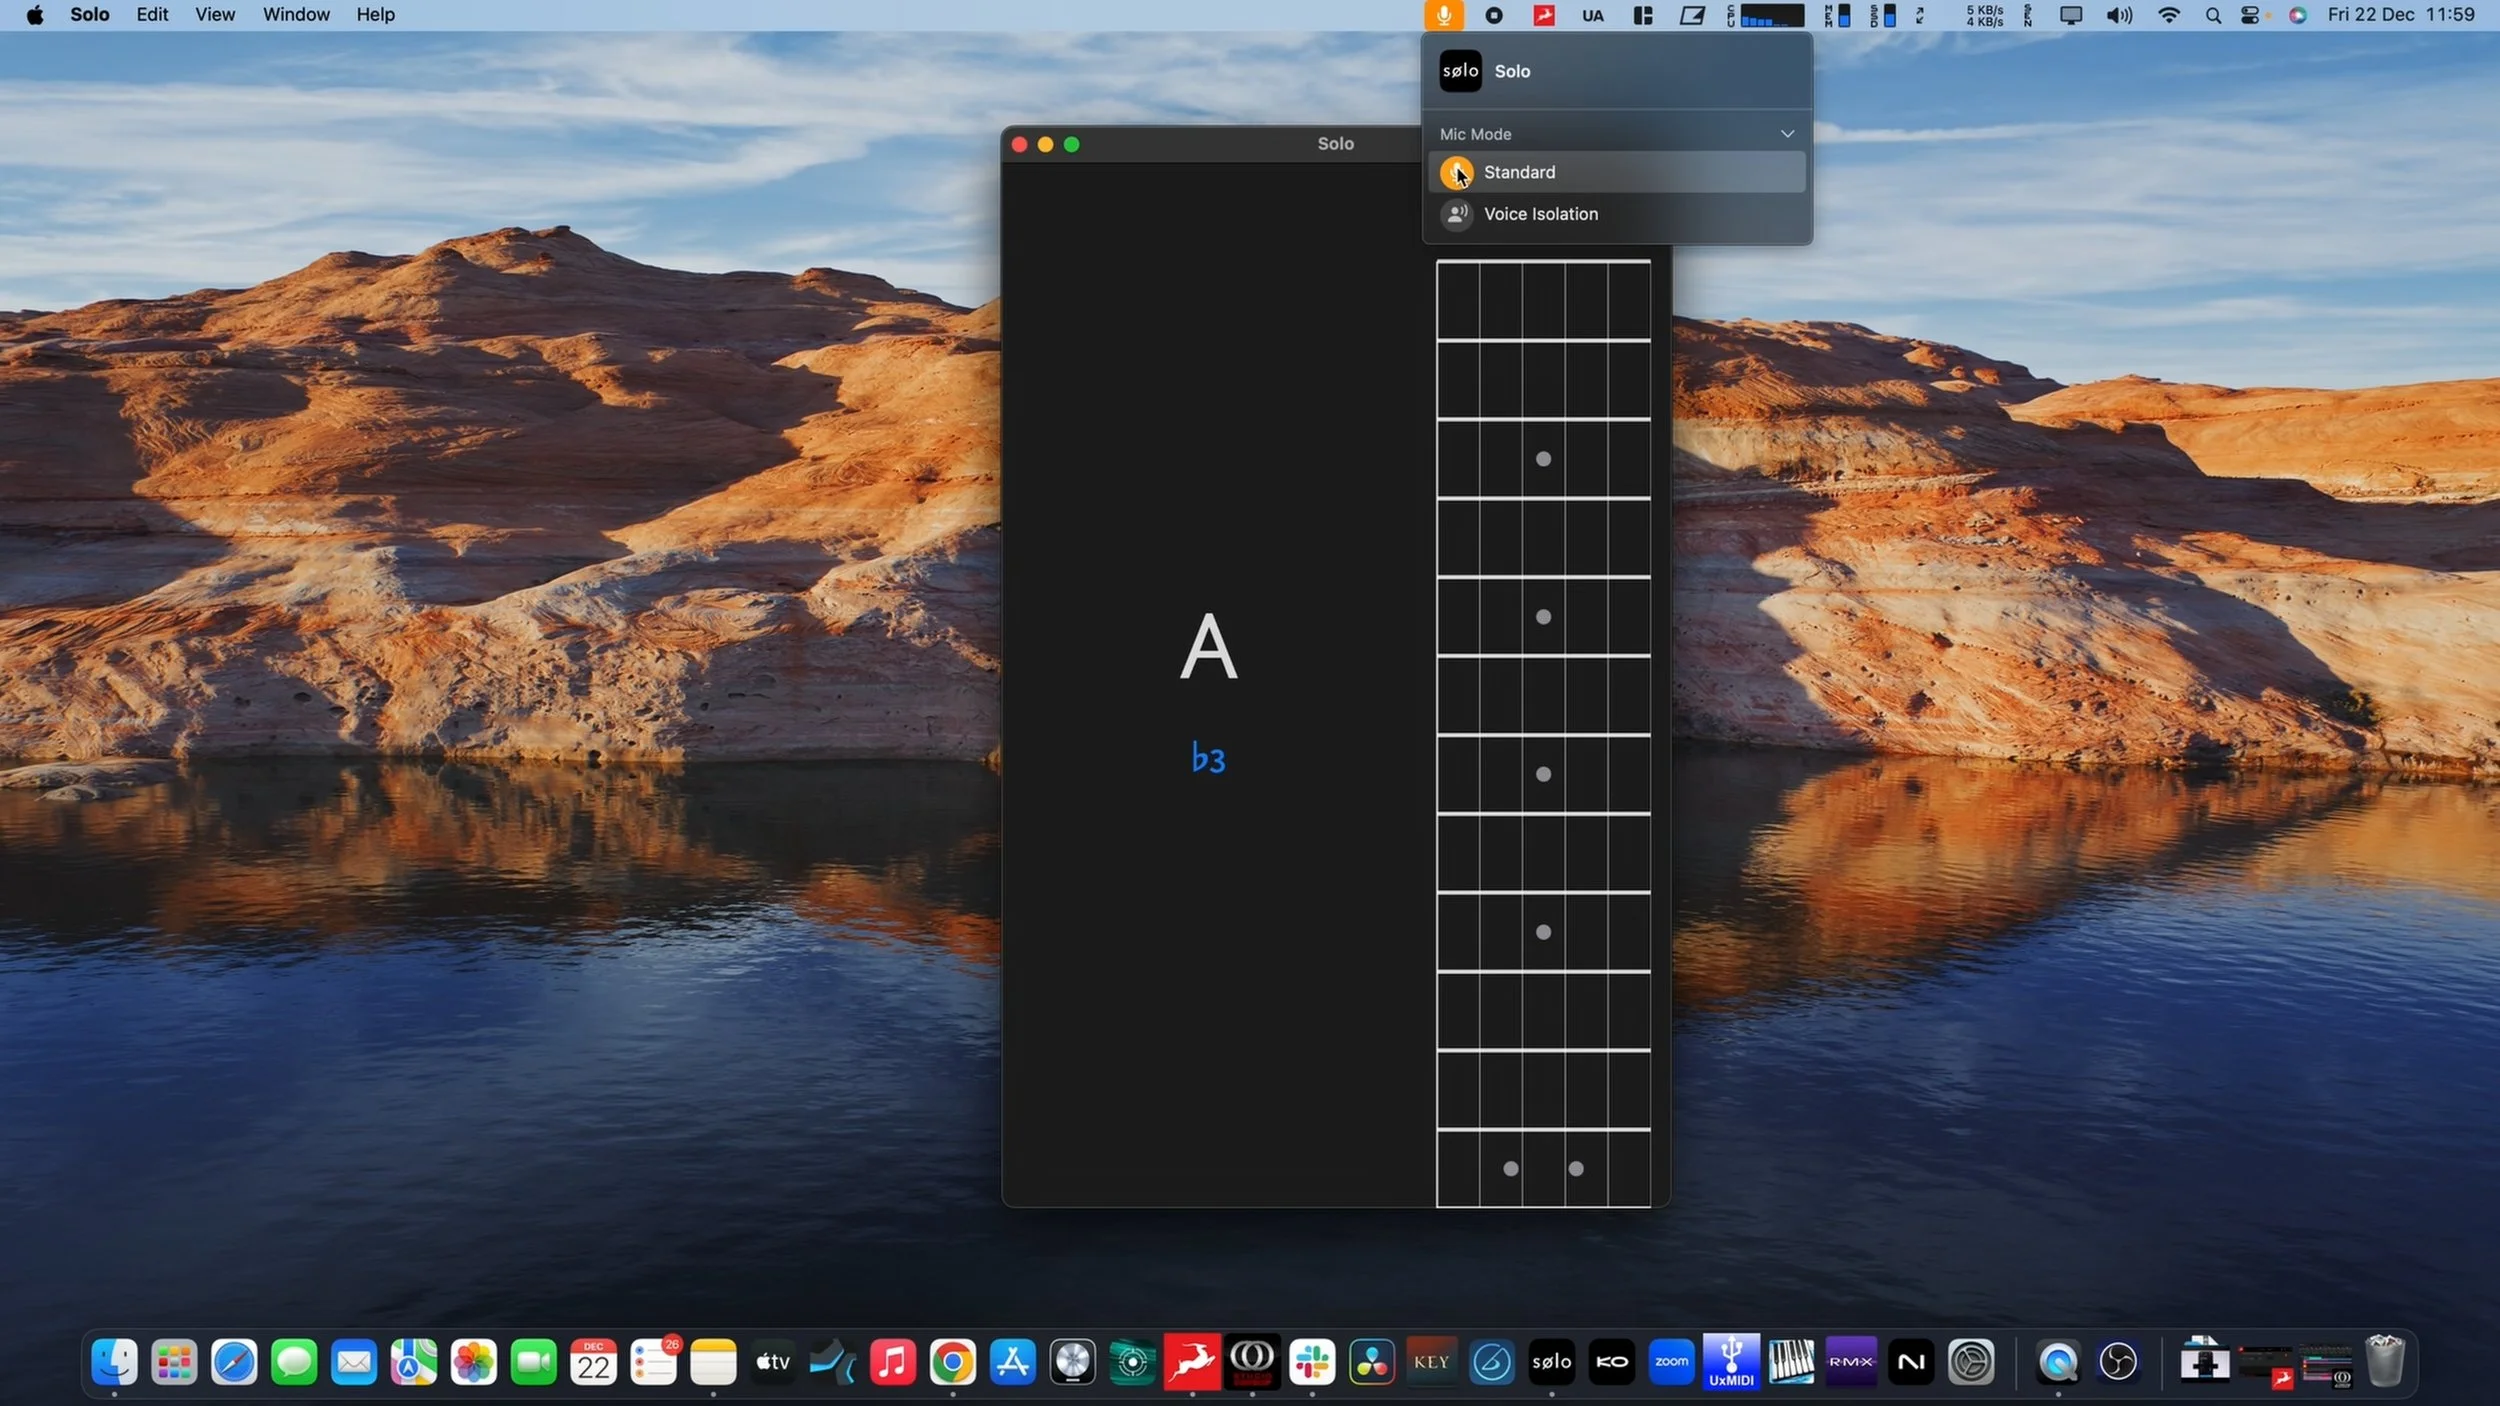
Setting the Mic Mode in MacOS